How to Change a Tire: A Comprehensive Guide
Changing a tire is an essential skill every driver should have. Whether you’re dealing with a flat tire on a lonely road or just want to learn how to handle minor car maintenance, knowing how to change a tire can save you time and money. In this guide, we’ll walk you through the process step-by-step, ensuring you have all the knowledge and confidence you need to tackle this task.
Understanding Your Tire
Before we get into the specifics of changing a tire, it’s important to understand the components involved. Your vehicle typically comes equipped with:
-
Spare Tire: This is a smaller, often temporary tire used to replace a flat.
-
Jack: A device used to lift your vehicle off the ground.
-
Lug Wrench: A tool used to remove the lug nuts that hold the tire in place.
-
Owner’s Manual: Your vehicle’s manual contains vital information about your specific car model, including the location of the spare tire, jack, and tire changing procedures.
Assessing the Situation
Before proceeding, ensure it’s safe to change your tire. If you’re on the side of the road, move your vehicle to a flat, stable area away from traffic. Turn on your hazard lights to alert other drivers of your situation.
Step-by-Step Guide on How to Change a Tire
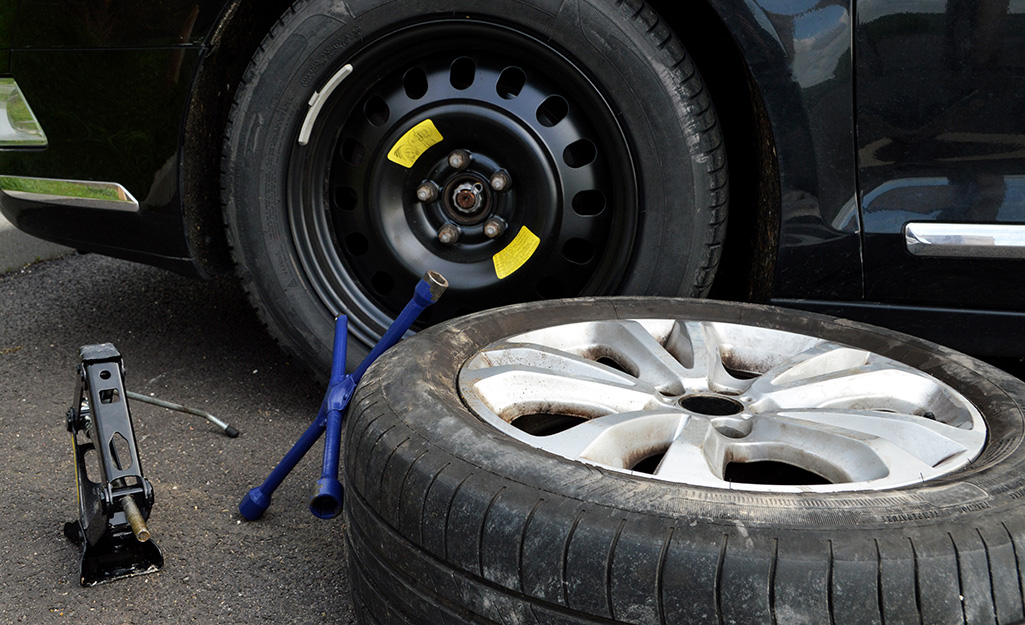
Step 1: Gather Your Tools
Make sure you have all the necessary tools at hand:
-
Spare tire
-
Jack
-
Lug wrench
-
Wheel chocks (optional, but recommended for safety)
-
Flashlight (if you’re working in low light)
-
Gloves (to keep your hands clean)
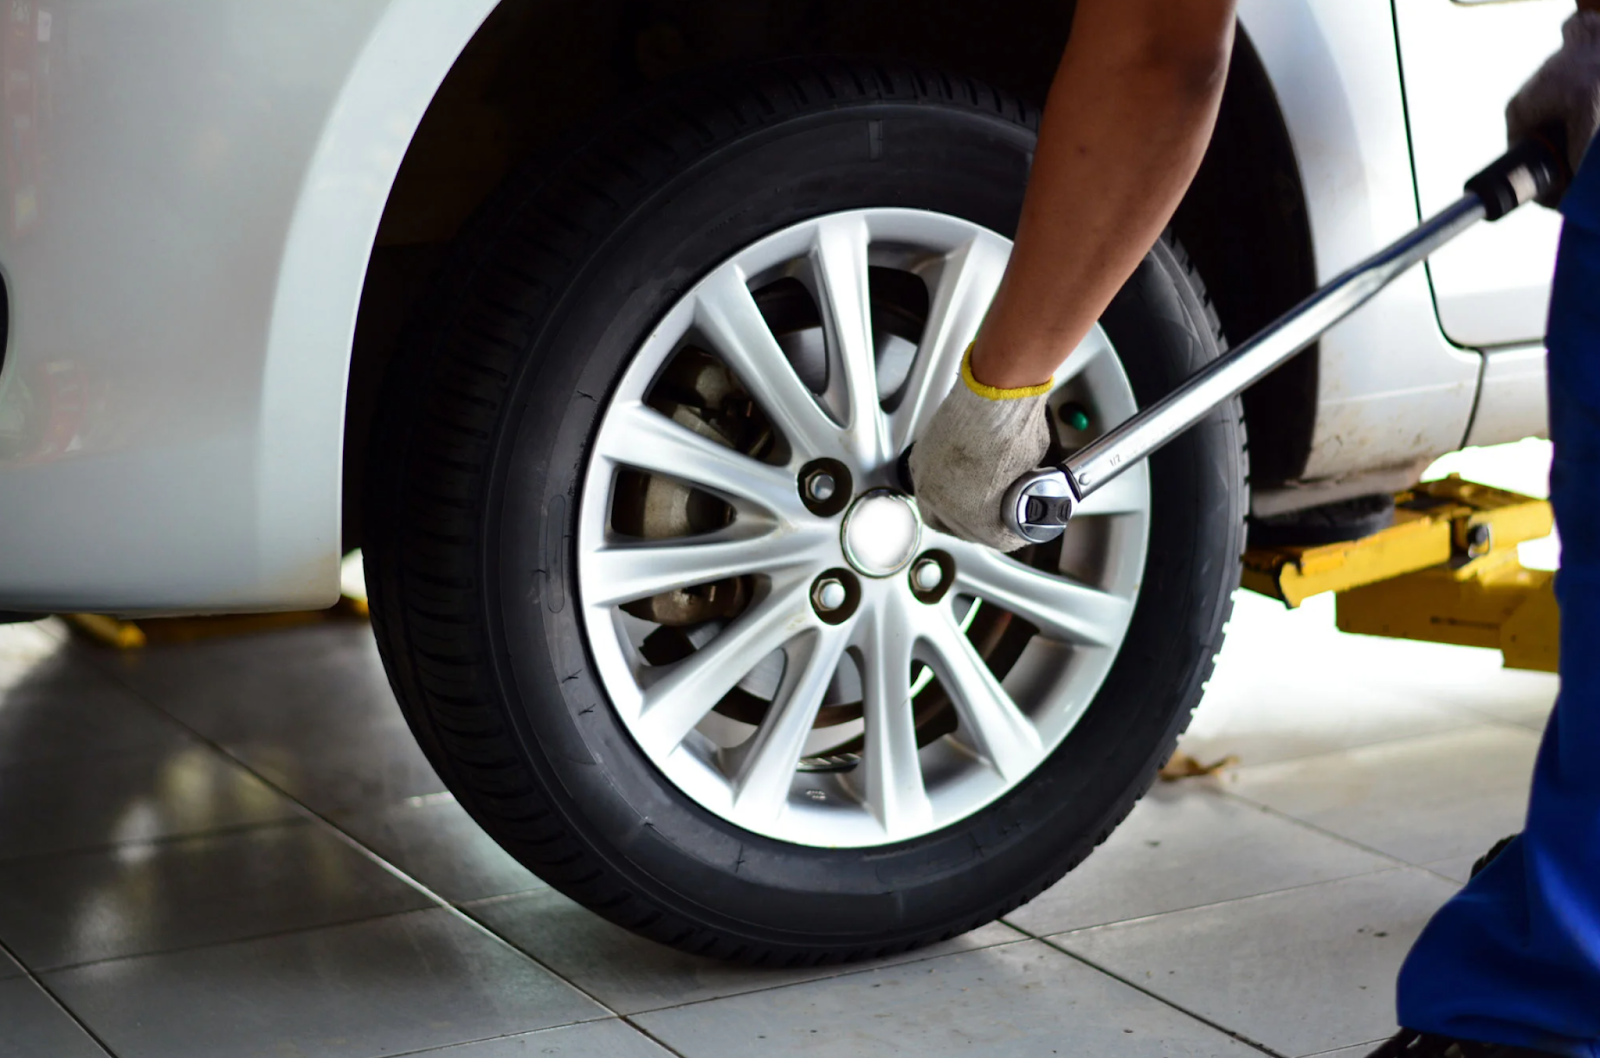
Step 2: Loosen the Lug Nuts
Before lifting the vehicle, use the lug wrench to loosen the lug nuts on the flat tire. Turn the wrench counterclockwise to break the seal. It’s best to do this while the tire is still on the ground to prevent the wheel from spinning. Do not remove the lug nuts entirely at this point; just loosen them a few turns.
Step 3: Position the Jack
Refer to your owner’s manual to find the correct jacking point for your vehicle. Usually, this is a reinforced area near the wheels. Place the jack under the vehicle and ensure it’s on a stable part of the frame.
Step 4: Lift the Vehicle
Slowly pump the jack to lift the vehicle off the ground. Make sure it’s high enough to allow for the tire to be removed. Ensure the vehicle is stable before proceeding to the next step.
Step 5: Remove the Flat Tire
Now that the vehicle is elevated, remove the loosened lug nuts completely. Keep them in a safe place, so they don’t get lost. Once the lug nuts are removed, carefully pull the flat tire straight off the wheel hub and set it aside.
Step 6: Install the Spare Tire
Align the spare tire with the wheel hub and push it onto the hub. Once it’s in place, replace the lug nuts. Hand-tighten them in a star pattern, which helps distribute the pressure evenly. This pattern involves tightening one nut, then moving to the opposite side, continuing until all nuts are hand-tightened.
Step 7: Lower the Vehicle
Now that the spare tire is secured, lower the vehicle back to the ground by slowly releasing the jack. Make sure the vehicle is stable before proceeding.
Step 8: Tighten the Lug Nuts
Once the vehicle is back on the ground, use the lug wrench to fully tighten the lug nuts. Again, use the star pattern to ensure even tightening. It’s important to ensure the nuts are secure, as this will prevent the tire from coming loose while you drive.
Step 9: Store Your Tools and Flat Tire
After completing the tire change, make sure to store your tools and the flat tire back in your vehicle. Check if the flat tire can be repaired or if it needs to be replaced.
Step 10: Test Drive
After changing your tire, take a short test drive to ensure everything feels stable. If you notice any unusual vibrations or sounds, stop and double-check that the lug nuts are tight.
Safety Tips
-
Wear Gloves: Protect your hands from dirt and sharp objects.
-
Keep a Safe Distance: Ensure you’re away from traffic while working.
-
Use Wheel Chocks: If you’re on an incline, place wheel chocks behind the other tires to prevent rolling.
-
Don’t Rush: Take your time and follow each step carefully.
Maintenance Tips for Your Tires
To extend the life of your tires and avoid flats in the future, consider the following maintenance tips:
-
Regularly Check Tire Pressure: Keep your tires inflated to the manufacturer’s recommended pressure.
-
Inspect for Damage: Look for cuts, punctures, or wear on the tires regularly.
-
Rotate Tires: Rotate your tires every 5,000 to 7,500 miles to ensure even wear.
-
Align and Balance: Get your wheels aligned and balanced to improve handling and tire life.
Conclusion
Learning how to change a tire is a valuable skill that can save you time and money in the long run. By following these steps and taking necessary safety precautions, you can confidently handle a flat tire situation. Remember to keep your tools handy and maintain your tires regularly to reduce the chances of a flat. With practice, changing a tire will become a quick and straightforward task, empowering you to stay safe on the road.
By understanding how to change a tire and being prepared for emergencies, you enhance your confidence as a driver. Keep this guide handy, and you’ll be ready to tackle any flat tire situation that comes your way.
LATEST
.png)
Last updated: Aug 31, 2024

Last updated: Aug 31, 2024

Last updated: Sep 10, 2024

Last updated: Sep 10, 2024

Last updated: Sep 10, 2024

Last updated: Sep 10, 2024